Archives

Mini-Iroshizukus are here!

The new mini Iroshizuku ink bottles have arrived!  They are 15 mL each, and just as classy looking as the larger size.  They come in individual bottles, plus some colors come in a 3-bottle gift set.  They are still pricey, as it’s practically $1 per mL, whereas the large version supplies 50 mL for about $30, but it’s still a nice solution for someone who doesn’t want to spend $30 or knows (s)he doesn’t need or want 50 mL of ink.

The cheapest price I have seen is $12.19 (with free shipping!) on Amazon, although it doesn’t seem that all colors are available.

They are also at JetPens.com for $14.00 + shipping (shipping price depends on your order).

New Iroshizuku Mini Ink Bottles are coming!

Just got word from the folks at JetPens.com that they will soon be getting in mini-sized bottles of Iroshizuku inks. No word yet on ounces or pricing, but I find this to be very exciting news for those looking to try some Iroshizuku colors without committing to the large bottle and hefty price tag.  More info as it’s released…

Review: Levenger True Writer Obsidian Fountain Pen

It’s been a little while since I’ve posted a pen review, but I’m now happy to tell you about one of my new favorite pens, the Levenger True Writer in Obsidian.

Appearance:  This is a nice looking pen!  This True Writer (“TW”) is black with “silver” accents.  I say “silver” because it is unclear from the product information whether the rings and clip are chrome or some other type of silver-colored metal.  The cap is black with a “silver” contoured clip and ring and then pen also has a cap ring engraved with “Levenger” and “True Writer.”  The body has another “silver” ring at the bottom and both the cap and bottom end of the pen have black jewels to match the body.  The section is also black.  The photo on the pen’s product page makes the black look more matte, but it’s actually very glossy.

LPE-TWinbox

LPE-TWjewel

Body:  The pen measures 5 1/2″ in length, 5/8″ diameter and weighs 0.77 oz.

I normally prefer thinner/medium pens over fat pens, and upon first use I felt the body/section was a little too wide.  However, after using the TW for only a few minutes I got used to the the width and now I barely notice it — even after switching between the TW and thinner pens.  It’s actually nice to have a bit of a fatter pen on certain days as it is quite comfortable to hold and use.

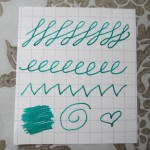
Nib:  Levenger nibs (this one included) are stainless steel and interchangable.  I requested a fine nib for this pen, but was sent a medium.  I was initially disappointed at this oversight, but upon first test my disappointment turned to pleasant surprise as this particular medium is on the fine side of medium and is actually just about the width for which I was hoping.  Levenger nibs have a tendency to be inconsistent in their widths, meaning some fines are finer than others, some mediums are more fine or more broad, etc.  It really just depends on which nib you get.  The nibs unscrew at the bottom of the section and thus can be exchanged with any other Levenger nib.  I had a slight problem with the converter/section/nib combo where the nib started unscrewing on its own and the ink leaked onto my fingers.  However, once I tightened it all was well again.

On first test the nib also seemed really stiff, however, I flexed it a little to spread the tines and after that the nib has been springy and very comfortable to use.

Caution:  be careful if you flex the tines on your Levenger nib because these nibs are not flex nibs.

LPE-TWnibcloseLPE-TWpiecesboxLPE-TWuncapped

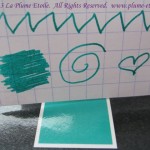
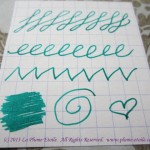
Performance:  Some TW users recommend cleaning or soaking the nib to remove any factory oils that may be present, but I decided to try it as is and see how it performed.  The flow was great from the first touch of nib to paper and the nib was perfectly smooth.  I filled the converter only part way the first time, and the nib started drying out close to the end of the ink reservoir, but before the pen was actually out of ink.  Concerned, I filled it again so it was full and while I did have one more dry nib issue, it has been performing reliably since then.

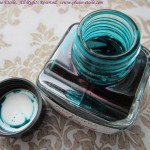
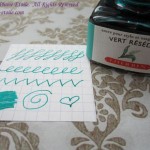
This pen comes with one mini-cartridge and one converter.  I chose to use the converter so I could pick my ink of choice.  I initially inked the TW with Iroshizuku Ku-Jaku (review forthcoming) and they have been great friends.  The flow is wet, although I think that is due to both the pen and the ink, as Ku-Jaku tends to have excellent flow.

levengertw-writingsampleLPE-TWbox2

Overall:  The Levenger TW is now one of my new favorite pens, and definitely my favorite modern pen so far.  It is visually sleek, well-balanced, comfortable to use, and reliable.   I would definitely recommend this pen.

However, I did have some problems with the Levenger employees/customer service reps.  I had called the company’s toll-free number for some information and both people I spoke to were extremely rude to me and refused to answer my questions.  For that reason I am hesitant to support the Levenger company itself with my hard-earned money.  I found this to be unfortunate, as it seems they make good products and I was hoping to become a regular Levenger customer.

***UPDATE 4/7/14****  I was contacted by Levenger’s Director of Marketing to find out about my bad customer service experience.  He was quite apologetic and the company has already taken steps to handle the conduct of the employees.  It seems my experience was rare and now I feel much more comfortable endorsing Levenger’s commitment to excellent customer service.  The company really does care about their products and reputation, so I am glad this situation was corrected. I am happy to continue to support Levenger and will bring you more reviews of Levenger products in the future.

Price:  The pen retails for $59 on Levenger.com.  Also available on Amazon – medium nib here and fine nib here.

Here’s a bonus box shot for those of you who love the boxes!

LPE-TWbox

Review: J. Herbin Vert Réséda Fountain Pen Ink

J. Herbin’s Vert Réséda has also been one of my favorite end of summer/beginning of fall inks.   The name translates as “reseda green” and the ink lives up to the quality I expect from J. Herbin.

The Bottle:  Like all J. Herbin bottles, the bottle is compact and has a much appreciated pen rest.  One newer feature is that the cap is shiny black plastic, whereas previous bottles had more of a matte plastic cap.

The Color:  This color is hard to describe, but it’s sort of a minty teal/turquoise.  It also matches one of my sealing waxes exactly, so that is a plus for someone like me who likes to color coordinate my writing accoutrements.

Consistency/Flow:  I found the flow to be moderate at first, but actually it got wetter the more I used it.  I started out testing the ink with an Esterbrook dip pen (nib 2442), and the flow was good.  Then I inked it in one of my vintage Vacumatics.  The flow started off just okay.  Now that I have refilled that pen several times with Vert Réséda, I have noticed that the flow has increased, the ink is wetter, and the color is slightly darker.  So this slightly darker color is what you see in the writing samples pictured, but note that you might experience the color to be a bit lighter and closer to the square on the top of the box.

Shading, Feathering, and Other Characteristics: I have not experienced any feathering with Vert Réséda.  At first, there was barely any shading at all.  I was slightly disappointed, but liked the color so much that I planned to continue using it even without shading.  However, again through refills and continued use, the shading has also increased along with the flow and wetness as described above.  As you can see the writing sample, it now has a fairly decent amount of shading.  This development is much to my delight, although I do not know if these results are typical for all users.

Writing sample close-up to see shading.

Writing sample close-up to see shading.

Overall:  I really like this ink and plan on keeping it in my regular rotation.

Writing samples written on Rhodia mini graph pad.

Writing samples written on Rhodia mini graph pad.

Purchasing and Pricing:  A 30mL bottle runs between $7-12 depending on the retailer and is available at most online retailers catering to fountain pen and ink users.  You can also purchase from one of the links below to help support La Plume Etoile.


Ink Review: J. Herbin’s Encres Acidulees Effet Scintillant (Pearlescent Inks)

Thanks to Karen at Exaclair, I recently had the opportunity to try some very fun and fancy inks.  J. Herbin’s Encres Acidulees Effet Scintillant  are Herbin’s group of Pearlescent Inks.  These inks are NOT for fountain pens, they are for dip nibs only.  There are several colors, all of which have a shiny/glittery/pearlescent sheen.  I discuss each ink in the group below.

The Colors (listed in the same order as the sample photo)

Pink:  A lovely bubblegum pink color.  When the ink is thinning on the nib, it can be sheer.  Frequent dipping to have a lot of ink on your quill/nib is best.

Peach (Peach):  A lighter, less pink color with more orange to it.  Same properties as the pink.

Blue:   A dark royal blue color.  It was really nice and quite a surprise as I expected a sky blue color since the rest in the group are more pastel.  As you can see, it doesn’t show up well on the darker paper.  I suspect it would do fabulously on a lighter paper.

Yellow:  Bright!  Despite it’s brightness, the hue is more of a softer yellow rather than obviously neon.

Green:  Also quite bright.   Maybe a prime creamy avocado?

Consistency/On Paper:  This ink takes a little trial and error to get it right.  I had to try a few nibs, but then found it worked well with some of the very small Brause nibs (again from Karen and distributed through Exaclair) because the smaller nibs held the ink and allowed it to flow onto the paper best.  The bigger nibs didn’t let the ink flow down well enough to complete a line.  Even with the small nibs, I had to dip often to keep enough ink on the nib so that the ink stayed thick and didn’t thin out like you can see in part of the writing sample.  I also had to take care in my pressure on the nib to avoid the ink transferring too quickly to the paper and creating blobs, as is a concern with wet ink.  However, I found working with care and patience avoided this problem.  This is definitely an ink to play with when you have some relaxing time to devote your attention without rushing.

Paper choice was also an issue.  I’ll save you some time — you can avoid reaching for the cheap paper.  This ink needs sturdy, thicker, high quality paper to support the thickness and composition of these inks.  The brown paper in the photo is a sample of G.Lalo (again, distributed by Exaclair  – this paper is great and a review is forthcoming).   The inks were very happy to be paired with G. Lalo paper and you shouldn’t have a problem if you use G. Lalo or a similar high quality paper.

An additional note is to take care in handling your writing even after the ink has dried.  As you can see in the photo, the pearlescence tends to smear a bit.

Overall:   There have been some other blogs in the pen and ink world that have given these inks poor reviews.  However, I really enjoyed testing these inks and plan to use them for special occasion items such as when writing someone a special card.  I already used the yellow color to make an artistic name card for someone special (on grey G. Lalo paper in case you are interested – it was a lively combination!).  I will be using these in the future.  If you are interested in them , I would recommend giving them a chance and playing with the right nib and paper combinations.  I have not tried other calligraphy inks that may be similar to these, so I cannot compare them to other brands.  I also just learned there are a few colors (like coral red!) that I did not get to try.  I must have that coral red!

Purchasing and Pricing: A pack of 5 assorted 10ml will run you around $20, depending on the retailer.

Restoring my new vintage inkwell

My friend Ian recently gave me an Esterbrook No. 427 Dipless inkwell.  I believe it belonged to his parents and it has been sitting unused for quite some time.

About the inkwell: There is not much information about this kind of inkwell online and it seems to be somewhat rare.  I have learned they were produced roughly between 1940 and 1952.  The base is made of bakelite, which is one of the first plastics made from synthetic compounds.  Bakelite has been used for radio casings, jewelry and other items.  The “dipless” type of Esterbrook inkwells does not mean that you don’t have to dip the pen.  The construction of the inkwell allows for a resavoir of ink where the pen inserts, so the pen needs to be dipped less often. These inkwells also came with chrome clips that fit on the grooves of the glass, but these clips were missing on mine.

The Beginning: Here is a photo (using the flash) of my inkwell when I received it.  The glass wells are upside down here and, as you can see, the entire inkwell is caked in dirt.

dirtyflash

Here is a shot without using the flash:

dirtynoflash

Cleaning: I filled a bucket with water and dish soap.  I rinsed all parts with water, and let the parts soak in the bucket while I worked on each piece individually.  There was still some very old ink inside the well and I was surprised to see it flowing out when I rinsed the well.  I carefully scrubbed the glass wells and rubber stoppers with a toothbrush and the soapy water.  Next, I did the same with the base portion, however, I also had to use a hard bristle cleaning brush because the remaining dirt was firmly stuck to the base.  Here is the result after cleaning it as best I could:

midflash

As you can see, there was still a bit of grime on it and the finish is very dull.

Polishing: After doing some online research and asking around, I learned the best product to restore and polish bakelite is a polish called Simichrome.  Simichrome is also used for silverware and, you guessed it, chrome.  The problem with this product is that it is extremely hard to find in brick-and-mortar stores.  I called eight stores before finding it in a local hardware store.  Simichrome is available on Amazon.com and various online retailers, but I much prefer buying products at a physical store. After finally buying a tube of Simichrome, I used it with a soft cloth to polish the base.  I used a car polishing cloth, but you can also use a soft old t-shirt.  First, apply a tiny amount of Simichrome on the cloth.  Second, rub Simichrome on the bakelite in circular motions, then buff it off with a clean portion of the cloth.  At first, the bakelite didn’t look much shinier than before.  Then I discovered that the magic really happens in the buffing portion.  Slowly, the bakelite started getting shiny. After buffing, the bakelite looked good.  However, I decided I wanted the bakelite even shinier.  I came to terms with the fact it would not be as shiny as if it had a clear-coat on it, but I wanted it to be as shiny as possible.  I then used Turtle Wax car polish and rubbed it on/buffed it out in the same manner as I did with the Simichrome.  The Turtle Wax I used was the paste version in the tub and it really helped to bump the shine up a notch.

Disclaimer: Using Turtle Wax was my own decision, as nobody recommended it to me for restoring bakelite.  I do not know if Turtle Wax is good for bakelite in the long term.  However, it worked really well, with no apparent damage to the bakelite.

Final result: In bright light, as seen below with the flash, you can still see some scratches in the bakelight:

finalflash

Without flash, you can see how the bakelite really shines.  This is how it looks in reality:

finalnoflash

Here are two more shots, with flash and without flash respectively, as to how the inkwell looks on my desk:

ondeskflash

ondesknoflash

I am really happy with how beautiful this inkwell looks now!  I am also happy to be able to give it new life and a good home.

I am happy to answer further questions about this restoration and comments are  welcome!

Another Reason to Love J. Herbin Inks

Yesterday I had what could have been a traumatic experience. I was filling a new Diplomat pen (reviews soon!) with J. Herbin ink and I dripped some on my favorite jeans! I quickly washed the spots in the sink with some cool water and Ivory soap. I was optimistic the ink would wash about because Herbin inks are usually very water soluble.

The result was a success! I let the jeans dry overnight and the ink spots are gone! With another ink brand, my favorite jeans could have been ruined forever, but J. Herbin’s gentle nature (and Ivory soap) saved the day!